Monday, December 18, 2017

WAGs (Winter Age Group Championships) Swimming 2017


Three of my nieces love to swim and this year the youngest asked if I would make her something for her "Good Lucks" to give the other participants. I have done this in years past but this year I made Christmas Tree Ornaments with a swim theme.   So while I wish her the best of luck in getting great times as well as the other swimmers in her group, here is how I made these, there are ten in total:


I started with a piece of wood I purchased at Michael's then had my husband cut it down into slices and drill holes into the tops for hangers.  I then took the Hero Arts set Coloring Layering Goldfish and stamped the base layer direct onto the wood circles in Hero Arts Shadow Ink in Butter Bar, the next layer was stamped in Hero Arts Ombre Butter to Orange ink and then did the eye/mouth detail in Versa Fine Onyx Black.  I then stamped the three air bubbles in Hero Arts Ombre Tide Pool to Navy ink and filled them in with the Spectrum Noir Glitter pen and coated them with Glossy Accents.  I found an old stamp set in my craft room with smaller numbers and stamped the year in Hero Arts Ombre Tide Pool to Navy ink near the top.  I then took the sentiment from the Hero Arts set and cut it apart..... which is only the second or third time I have ever done that, and while I know it does not hurt the stamps it is just so against my normal behavior that I still flinch when I do it, even if it makes it easier for me in the long run. I started by laying out the word "swimming" and curving it slightly so it would fit at the bottom of the ornament, then I stamped it onto the ten wood slices in Versa Fine Onyx Black ink, once they were dry I then took the "Just Keep" part of the sentiment and cut it apart and stamped the "Keep" in Versa Fine Onyx Black ink over the "swimming" then I used some of the green sea grass and stamped them at the bottom in Hero Arts Shadow Ink in Green Hills and coated them with the Spectrum Noir Glitter pen for some added shine.  On the back I used some letter stamps from my stash and stamped out WAGs in Hero Arts Ombre Tide Pool to Navy.  I then found some pretty blue silky cord and attached two small jingle bells and then tied them off.


My niece called after giving the other participants and coaches their ornaments and gifts and they were a hit. One of the coaches even put his on his Christmas tree right away and sent a picture.  And since this post had not gone live, my niece did really well with her times and brought her A game to WAGs, dropping seconds in almost all of her events. I am so proud of her, as I am with all my nieces and nephews.  Hope you enjoyed seeing my newest project and I will see you all soon!

Friday, December 8, 2017

Let It Snow - Mood Board Challenge #17 SumMore Fun


Hello Everyone,
For my design team project I decided to try out my Ken Oliver Color Bursts and go with a cool color scheme.  So I started with a large piece of water color paper, I figured I could cut out the perfect background piece and have left overs to make more pretty stuff with.  Then I got to playing.  I started by getting the paper wet and adding the Color Burst in Turquoise then spraying more water and letting the color move, I added some Ken Oliver Liquid Metals in Platinum and love the shimmer it gives, it is so hard to get it to photograph but is so pretty in real life.

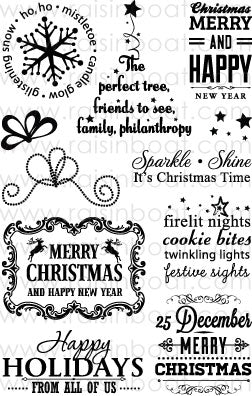
I let my paper dry overnight.  Once it was dry I cut out a piece with a large rectangle stitched die and then laid out my snowflake stamps in my MISTI.  All the snow flakes came from the Let It Snow (9085-Z) set from Raisin Boat.  I used my versa mark ink and stamped the flakes and then used platinum embossing powder and heat set. I turned my card stock around in the MISTI and rearranged my stamps and did the process again.  I set the finished panel aside and turned my attention to the sentiment. I laid out a piece of water color paper and used the circle snowflake word stamp from the Holiday Wishes (9309-Z) Raisin Boat stamp set and stamped with versa mark ink and heat set with the platinum embossing powder.  I then borrowed a tag die from a crafty friend, I loved the scalloped detail at the bottom, and laid it on the paper to see where I wanted to add the sentiment.  I decided to offset the circle and then stamped the sentiment from the same Holiday Wishes set, in Ranger Archival Ink in Paradise Teal. Then I cut out the tag with my die cutting machine.  I popped up the tag with foam tape and added it with a slight offset to the finished blue and white snowflake background and then added the completed finished piece to a dark grey card base cut to 4 1/4" x 11" then folded at 5 1/2" for a top fold card.  I then used a small piece of glimmery white tulle and added a bow to the tag top.

I hope you have enjoyed my project, please come play along with the new mood board, the colors are so pretty and you may win a $20 Gift Certificate.
You can use the colors, theme and/or pictures as inspiration, we would love to see what you create.

See you all soon!

Products Used:
 Holiday Wishes


Saturday, December 2, 2017

It's A Polka Dotted Christmas


Hello everyone,
Happy Saturday everyone! I have been looking at this stamp from Victorine Originals and in my head I have ideas.... but it is making those ideas work that has kept me stumped, until I found this pretty Christmas paper in my craft room.  The greens and reds with the cream background just made me think I can make it work! So I pulled out a piece of red card stock and cut it down to 4 1/4 x 11" and folded it at 5 1/2" for a top folding card base, I then set that aside.  I then cut the decorated card stock down to 4" x 5 1/4"  and I found this pretty ribbon in my Christmas paper box and thought it would be the perfect touch on the bottom, so I took the three colors and attached them to the backside and twisted them and then pulled them across the front of the card and attached to the back, then I cut fun foam to go on the back of the card stock and cut a channel out for the ribbon so it would not push that part higher on the front.  Then I laid that down onto the red card base and set it all aside.  I then took a piece of matching red card stock and cut it with a die in my stash and took some Nuvo Glimmer Paste in Moonstone and used a snow stencil to add some dimension to the die cut card stock.  While that was drying I used my MISTI and stamped the Polka Dotted Christmas Tree on vellum with versamark ink and heat embossed with white embossing powder, I did this three times to make it very smooth and thick, then when it was cool I fussy cut the vellum tree.  I then spent a long time cutting small pieces of foam tape and attaching them to the back of the tree, I went around the small polka dots before I decided to use the rainbow confetti sequins and cover the polka dots where the vellum was showing.  When my red die cut piece was dry I attached it to the card base and then attached the tree and once that was completed I then added the confetti pieces in blues, red, green, silver and gold in random sizes.  I am so happy with how the card came out and hope you enjoy.


Please make sure to check out the ongoing mood board, pictured below, and join in, we would love to see your projects.

Stamp(s) Used:

 Polka Dotted Christmas Tree Stamp

Sunday, November 26, 2017

Warm Holiday Wishes


Hello Everyone,

We here in Southern California have been having a heat wave during this Thanksgiving week and that led me to pulling out this super fun and adorable stamp set by Avery Elle, Flamingo Bells.  I started by stamping my images onto some water color paper and then using my Zig Clean Real Brush Pens to color them in, while they were drying I pulled out a piece of Neenah Solar White 4 1/4 x 5 1/2 and did some ink blending with my TH Distress Oxides in Worn Lipstick, Picked Raspberry,  Seedless Preserves and Faded Jeans from about 1/4 of the way up from the bottom.  I then flicked on some water and set it aside to dry. When dry I then took Simon Says Stamp Ink in Barely Beige and blended the bottom portion of the card as if it was sand.  When it was completely dry I then took the little snowflake stamps in the Avery Elle set and using versa mark ink and white embossing powder stamped them all around the top portion of the card. I then used the coordinating dies and cut out the main palm tree scene and the cute little flamingo.  I used foam tape on the top portion of the die cut from about the Christmas lights up and then below used liquid glue and attached to the inked background. I then used a dab of liquid glue on the flamingo and stuck him down.  I stamped the Warm Holiday Wishes on the bottom portion of the card with my MISTI and then added the finished panel to a white A2 sized side folding card base.  I sprinkled a few crystal clear confetti sequins on the card and it is all finished. 
I hope you enjoyed, see you all soon!

Friday, November 24, 2017

Let It Snow(men)


Hello everyone,
Here is my DT project for the new Mood Board at SumMore Fun/Victorine Originals, I honestly had a hard time since we are in a heat wave again this week (got to love Southern California) but I love cooler weather and so I put my thinking cap on and thought SNOWMEN! and I have this great border stamp from Victorine Originals that is adorable and then I thought well Christmas is coming (I can say that now that Thanksgiving is over, right?) and what do I always need, tags! So let's jump in and see how this came together:
I started by die cutting the tag from a piece of watercolor card stock and then stamped these adorably cute snowmen in Hero Arts wet concrete and then water colored with my zig clean color real brush pens.  I just did a very light blue wash in the background then when dry went over it again, and then a dab of orange for the carrot nose and then a light green for the scarf and a dab of dark red on the buttons, each snowman was then finished off with a coat of spectrum noir clear glitter.... because glitter! Here is a picture before I folded the tag over and added the hanger:
 After it was dry I folded it over and used a small piece of double sided sticky tape to close it and then added the hole and hanger string.
Then I found these clear gemstones that look almost like diamonds and attached a couple of them for some more added interest and then it was done.  Quick and easy and I can tuck some cash inside or a little note and attach to a gift or the tree.


Thank you for joining me and go check out the challenge, it is going to be a fun one and I look forward to seeing your projects, the mood board and link are below:

 Mood Board
Stamps Used:
 Christmas Borders

Saturday, November 18, 2017

Thinking of You

Happy Saturday everyone,
Heather here taking over the SumMore Fun/Victorine Originals blog today with this adorable little kitty stamp from the Raisin Boat set called Wild About Ewe, Honey.

I needed a thinking of you/get well type message and felt this little guy would brighten anyone's day.  So lets get started with how this came together.
I started with a piece of watercolor paper and stamped the kitty in a dark brown hybrid ink then water colored him, we have an orange tabby that I used as my inspiration.  

I then did a distress oxide wash behind him and cut him out with a square rectangle stitched die from my stash.  I went with an A2 sized, top fold dark grey card base and then found some super cute and fun paw print paper in grey colors in my craft room that was perfect.  I cut that down to 4" x 5 1/4" and put it onto the card base where I then laid down the dark grey band and popped up the kitty with some fun foam and put him on top. I wanted to add a sentiment as I am sending this to someone who is very special to our family and needs a pick me up and I immediately grabbed my Victorine Originals Elegant Sayings and used the beautiful Thinking of You.  It was a cute, easy and quick card to make and I am sure it will be loved when it is received.  

Have a great day, supplies are pictured below and don't forget to enter into our current challenge. Click on the pictures to link directly to the Mood Board or products used on my card.

 SumMore Fun Mood Board #15

 Wild About Ewe, Honey Elegant Sayings


Friday, November 10, 2017

All Tied Up In Red Glitter


Hello everyone,
For the new challenge, All Tied Up, over at Victorine Originals I fell in love with the colors and the pictures on the beautiful mood board.  So I started with a light grey piece of card stock and stamped the Christmas Light Strand from the Christmas Borders set three times on a diagonal with Onyx Black Versafine ink and then heat set with clear embossing powder, then I colored in the lights with a red marker and then filled them in with Nuvo Glitter Drops in Ruby Slippers and then set it aside to dry overnight.  When it was dry I then added a piece of red glitter ribbon across the top and attached two small red glittery mini ornaments to the ribbon and stamped the Happy Holidays sentiment in black ink along the bottom of the card then I attached the light grey card stock onto a piece of darker grey for a small border at the bottom and placed the whole piece onto a side folding A2 card base.


We would love to have you come over and join us at the challenge, you can play along with any of the elements on the mood board; the title, the colors, the pictures or all of it, and we would love to see your creations.  Here is the board for inspiration:


Stamps Used:
 Christmas Borders Set (Unmounted Only) (10508-X)
See you soon!

Saturday, November 4, 2017

Elk Silhouette in Snow


Hello everyone,
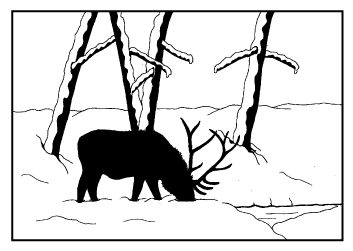
It is my turn to take over the blog at Victorine Originals today and when I saw this stamp set I knew what I wanted to create. For anyone who crafts you know that sometimes what you envision and what comes out are different things, but in this case my project came out better then I had hoped for. So let's see how it all came together:
I started with a piece of light tan card stock cut to A2 size (4.25 x 5.5)and stamped my image using versa-mark clear sticky ink and then heat setting with liquid platinum embossing powder.  I then colored the trees, snow and water area with prismacolor pencils.  On the top portion I used a craft knife and cut out the "sky" openings.  I placed a piece of acetate behind the windows I cut out and then covered the back with fun foam leaving the window area clear.  I found some Marquee Love Glitter from Heidi Swapp in my stash and filled the window.  I then affixed a back piece on to my scene.  I then used a small palette knife and Nuvo Glimmer Paste in Moonstone and added some to the snow bank areas. Then I used some Nuvo Translucent Jewel Drops and covered the water area. To finish the card I added my panel to a side folding A2 card base in Kraft.   I am so happy with how it all turned out.  

Thanks for stopping by, don't forget our current challenge, Give Thanks, is still going on over at the Victorine Blog come on over and join the fun.
See you soon!
Stamp Used:
Elk Silhouette in Snow


Friday, October 27, 2017

Fall Thank You


Hello everyone,
The new Mood Board, Give Thanks, is up over at Victorine Originals and the start of a new challenge. I went with a one layer card that would be easy to mass produce and has a very fall feeling vibe going on.  I started with a piece of green medium weight card stock that I cut to 4.25" x 11" and then gave it a top fold by creasing it at 5.5".  I then used the beautiful large "Thank You" stamp from Victorine Originals and stamped with Hero Arts Moss Green ink, using my MISTI for precision stamping.  I then took the Pumpkins on a Vine stamp and stamped at the bottom of the card, again in the Moss Green ink, when that was dried I masked it off and turned the stamp upside down and stamped again to give the illusion of a field of pumpkins.  I like that it is a simple yet elegant tone on tone card and it is also not my normal card, so I stretched my crafty self a bit. 
Come join us and show off your cards or projects, we would love to see them. The Mood Board is below for you to check out and the stamps I used are below as well.
See you soon!
G


Thank You (2873-J) Pumpkins on a Vine (2587)

Saturday, October 21, 2017

Halloween Gift Card Tags


BOO!
It is my turn to take over the blog at Victorine Originals and I decided to try something a bit different, so I made some gift tags using the Halloween Kids stamp set from Victorine Originals and the We R Memory Keepers Nesting Dies Fold Over Tags.


I started by stamping the pumpkin (twice), the Mummy and Dracula onto some watercolor paper in versafine onyx black ink and then heat setting with clear embossing powder.  I colored them with my Zig real brush markers and then fussy cut them out.  I covered Dracula's cape and the pumpkins with a coat of clear Spectrum Noir glitter pen for some sparkle.  On the pumpkins I also used the Nuvo Glow Drops in Banana Split for the eyes, nose and mouth for some added fun.

For Dracula's tag I took a piece of grey card stock and then used a stencil from my craft room and sponged it with Distress Oxide Ink in Black Soot and then sprinkled some water onto it for some added interest. I put my tag together with some strong adhesive tape and then added a few silver glitter embellies at the top and some orange and black bakers twine. I glued my pumpkin directly to the tag and then I popped up Dracula with some foam tape. I used the Sentiment Happy Halloween form the Halloween Kids Stamp Set from Victorine Originals and cut it apart to make it work when I attached it to a gift card. Here are some close ups of the Dracula tag with the gift card in and out:

For the Mummy card I started with a piece of purple and black card stock paper and used another tree stencil from my crafty stash and again used Distress Oxide Ink in Black Soot.  I assembled my gift tag and added some purple and black bakers twine at the top and some dark purple glitter embellies on the tag, I used the BOO! From Me To You sentiment and glued down the pumpkin, added foam tape to the back of the Mummy and finished off tag 2.  Here are some close up photos of the Mummy tag:


We still have the current Mood Board up for the challenge over at the Victorine Originals Blog and I will put all the links below, please join us and share your crafty projects with us.
See you soon!

Stamps Used:
Halloween Kids Set