Tuesday, October 2, 2018

Hippo Baby Card


Hello everyone,
I am back to share this baby shower card I made for my eldest son and his wife who are expecting their first baby soon and I used the absolutely adorable Rainy Day Play stamps and dies from Clearly Besotted.
I started by using my Distress Oxide Ink in Broken China on a piece of Neenah Solar White 80# card stock then sprinkled some clear water on and blotted off, when dry I cut it out using the Wonky Scalloped Frames from Avery Elle.  I set this panel aside and then cut a piece of Neenah Solar White 80# card stock with the same die for the outside frame.  I then took a piece of Neenah Desert Storm card stock and made an A2 sized side fold card base, I then glued down the frame and inked panel to the card base and set aside to work on the elements.  I colored the hippo and his umbrella, water puddle, splash and ducky with my Copics and then glued them on my panel. I used the "Welcome Baby" sentiment from Newton's Nook Loveable Laundry set and stamped in Versafine Black Onyx ink on the front of my panel.  I then used my white gel pen for accents on all the elements and my Spectrum Noir Glitter Gloss Pen on the umbrella, puddle, heart and splash, then used Glossy Accents on the heart, splash and ducky.  I finished my card with some clear confetti sequins from Unity Stamps.  And that is all for this card.

See you all soon!

Update Time


Change is so hard but yet it is inevitable....
The only thing constant in life is change

So I know it has been a while since I have posted but I am back.  
Life happens and wow has it been a busy few months.  I do have a card and it will post shortly and I think it is a fabulous return for my crafty blog.  I will try to post a little more frequently then I have recently, but it will still be a bit hit and miss for a while.  My folks are currently living with us as they prepare to move to a new state and personally our family business is changing and growing and taking up quite a bit of extra time.  Also, I wanted to personally write and say that I absolutely loved being on the SumMore Fun Design Team, but my time there is over, it was fun and I have learned so much and stepped out of my comfort zone by being on the DT and so I am sending a huge thank you to SumMore Fun for having me.   
So having said that, enjoy my upcoming post and I will see you all soon!

Friday, July 20, 2018

Wings of Celebration - SumMore Fun Challenge #33


Hello everyone,
For my card today I started with a piece on Neenah Solar White 110# card stock cut to 4"x 5 1/4" and stamped the Butterfly (1594-B) from Victorine Originals in Versamark Ink then heat embossed using Ranger Holographic Embossing Powder.  I then used  Ranger Distress Oxide Ink in Salty Ocean and blended from the top of the card stock downwards to get a slight ombre blend.  I spritzed my paper with water and let sit to dry while I worked on the rest of the card.  I then took a piece of Neenah Solar White 110# card stock cut to 4 1/4" x 5 1/2" and swiped Ranger Distress Oxide Ink in Blueprint Sketch around the edges.  I then taped this piece direct to a side folding A2 sized white card base. I then stamped my sentiment from  Raisin Boat's Flourishing Thoughts stamp set (10271) in Versamark Ink and heat set with  Nuvo Fine Detail Embossing Powder in Glacier White on my top design so I could add fun foam to the back to pop it off the card.  To finish off my card front I added some Iridescent Confetti Sequins to make the body for my butterfly.  I then added my fun foam and popped the top layer off the card leaving a small border on the top and left side of the card for interest.  I finished the card off by adding Wink of Stella to the butterfly wings for more sparkle. 
We look forward to having you join us on the Challenge,  the mood board and stamps I used are linked below, if you use code HEATHER10 at checkout you will receive 10% off your purchase at the Shop
See you all soon.


SumMore Fun Challenge #33
Stamps Used:

Butterfly (1594-B)Flourishing Thoughts (10271-Z)


Saturday, July 14, 2018

May All Your Wishes Come True Birthday Card


Hello everyone,
It is my day to take over the blog at SumMore Fun (Victorine Originals) and I am always in need of birthday cards, but this would have also made a super cute wedding shower card.  I started with an A2 card base in Kraft and then cut a large banner out of some cute Kraft paper with pink polka dots from my crafty stash, I then cut out a circle in the middle of the banner .  I stamped a sentiment from the Raisin Boat Stamp Set Flourishing Thoughts (10271-Z) at the bottom of the banner.  I added some twine with a small bow at the top and then popped the banner up with some foam tape on the card base.  I then cut a circle out of Ivory card stock and stamped the super cute cake stamp from the Raisin Boat Stamp Set Off To Party - Old Design (10003-Z) and then used some pink Copic markers and colored in the cake and topped it off with some Nuvo Clear Glitter Gloss.  I then placed the circle into the space on the banner flat to the card for some added interest with different dimensions between the banner and the circle.  I finished my card off with some pink embellishments.
See you soon!

Stamps Used:

 Flourishing Thoughts
Flourishing Thoughts
 Off To Party- Old Design
Off To Party - Old Design

Friday, July 6, 2018

SumMore Fun Challenge #32- Red, White & Blue Stars


Hello everyone,
I hope you all had a safe & Happy 4th of July.  We are back with our newest challenge and I love this mood board,  I will link to it below and hope to see you all join us and play along.

For my card I started with a Kraft A2 sized card base.  I then cut a piece of patterned card stock I had on hand to 2" and applied that direct to the card base at the bottom, with a small strip of the Kraft card base showing. I stamped the sentiment from the Raisin Boat stamp set (Strokes of Pride 10212-Z) onto the lower portion of the white area of the patterned paper.  I then cut a piece of white water color paper to 2 1/2"x 5 1/4" and prepped the surface with my anti static powder bag.  Using the star stamp from the RB Strokes of Pride stamp set, I stamped the image numerous times with Versamark Ink and then heat set with clear embossing powder.  I applied Tim Holtz Distress Oxide Ink in Fired Brick over the panel, and when done I wiped off the stars with a dry paper towel to get the ink off the embossed areas and then flicked clean water onto the panel for some distressing.  When my panel was dry I cut a piece of fun foam for the back and applied the fun foam to the panel with some heavy duty double sided tape.  I then added my panel to the card base.  I finished off the card with some red, clear and blue confetti sequins.
The stamps I used are listed below and if you use code HEATHER10 you will get 10% off your purchase at the shop.  Thanks for stopping by, see you all soon!


SumMore Fun Challenge #32


Strokes of Pride

Saturday, June 30, 2018

Perfectly Imperfect - Cherry Blossom Envelope Art


Hello everyone and happy Saturday!
So this take over the blog post is going to be downright honest and truthful and I am going to share a project that I like now but originally I was not a fan of, and I am going to tell you all why.
So let's get started.

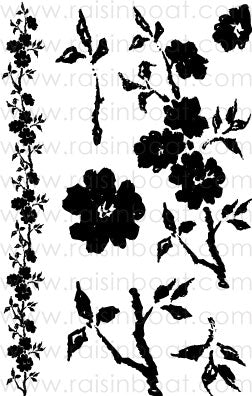
I started with a Kraft envelope and using the Raisin Boat Cherry Blossom stamp set (10149-Z) I colored the stamps with water color pens and spritzed them with lots of water, I then stamped them down around the address area I had doodled around with a thin black pen.  Isn't this stamp pretty and look at how unexpected my results are, I mean they are Cherry Blossoms but are so undefined and ethereal, fun right?

I moved the stamps all around and continued adding water colors to the stamps, spritzing with water and stamping down.  I then set that aside to dry.  When it was dry I took some Perfect Pearls in the color Perfect Pearls and added some water to an acrylic block, mixed them together and then flicked them onto the envelope.  I then added my "To" address (I do have permission from the recipient to use her address) and this is where things took a turn..... I hated my handwriting and messed up the address, so I tried to fix it and it just got worse.  But I did not want to throw away the envelope, I liked it.  So I took an exacto knife and cut out the address portion.  I know right? Crazy!  So then I took a piece of acetate and backed the window like I would a shaker card or window envelope and it was better and then I re-doodled the lines around the window.  I then took a piece of Kraft card stock and re did the "To" address and when I was happier with it I attached it to the inside of the card. 
To finish it all off, because I really am going to mail it, I needed a stamp.  And I have an abundance of stamps because I LOVE them and when the post office releases new ones I am generally right there in line adding to my supply.  So the other thing is I try to match stamps on my cards to the recipient, and this recipient is a fan, ahem, FAN of Disney, the stamp does not necessarily match the watercolor flowers, except the brown colors, maybe, sort of.... but I decided to stick with my decision.   And that was the next area I was a little unhappy with, until I started to really think of why I was making the envelope, who I was sending it to and the fact that any kindness or thought of another is generally what makes people smile and gives them happiness.  So although it is not "perfect" and  I see the "flaws" I reevaluated and I like it after all, it is real and shows the true reason I got into card making, sharing a smile and a thought and a bit of happiness.  Because in the end who does not like to get happy mail in their box whether I see an "issue" with it or not, because generally speaking we are our own worst critics and maybe just maybe it was me stepping out of my crafty box and just feeling like it was so different from my normal that it wasn't good enough or perfect. So this Saturday I wish you all patience with your self and your talents and joy that you create and that whatever you create or share is perfect and special and appreciated, no mater what your little inner voice tells you, you rock!
See you all soon

Cherry Blossom (10149-Z)

Friday, June 22, 2018

SumMore Fun Challenge #31 - Cherry Blossoms


Hello everyone,
Our new mood board/ challenge #31 is up and we want you to join us!  This mood board is amazing and has great images and colors to help you design a great project.  I used the mood board colors and came up with this card design. So let's check it out:


I started with a white A2 side-fold card base and then layered some Kraft card stock that was cut to 4 1/4" x 5 1/2" on top. To give it some dimension I added fun foam to the back of the Kraft before placing it onto the card base.  I then set this aside and worked on my stamped top piece.  For the stamped panel I used some white Mixed Media paper and placed the large blossom and branch stamp from the Raisin Boat Cherry Blossom (10149-Z) set into my MISTI and using water color markers I inked up the stamp, spritzed with water and stamped down. I held the stamp down so the ink could soak into the paper and then I cleaned the stamp and re positioned the stamp two more times and using the water markers did the same steps.  I used a darker pink, two purple colors, a dark green and a brown marker to go with the mood board colors.  I then stamped a sentiment from the Raisin Boat Flourishing Thoughts (10271-Z) stamp set in Versamark Ink and heat set with Gold Embossing powder. I then used a thin strip of gold glitter washi from my crafty stash and placed that at the bottom of the panel and finished it off by gluing the panel to my already made card base.  I am working to get my card stash replenished and although I do not need a sympathy card now I know when and if I do I will have one.  I do believe these are some of the hardest cards we have to design but that when a friend or loved one loses someone it is so important they know they are thought of and loved. 
I do hope you will all join us on the current challenge, I have linked it below and I thank you for stopping by, see you all soon.
Challenge #31 Mood Board
Cherry Blossom (10149-Z)
Cherry Blossom (10149--Z)

Saturday, June 16, 2018

Ride On


Hello everyone and happy Saturday!
It is my day to take over the blog at SumMore Fun and I went for a fun, summer time vibe with my card.  So let's check it out.

I started with a white piece of card stock cut to 4" x 5 1/4" and stamped the "Bug" stamp with some Archival Red Geranium Ink. I am using the Raisin Boat Off to Party (10003-Z) stamp set and corresponding sentiments.  I then colored in the bumper area and tires with a black fine tip pen.


Using Copic Markers in N0, N1 and N5 I colored in some pavement adding some dot details to where the tires would have driven.  I found some black glitter washi tape and some black and white grid washi in my stash of crafty supplies and added that to the bottom of the card.  I then used the "Ride On" sentiment in the set to stamp on the license plate in black ink and the little flower stamp onto the back window in gold ink. I added the panel to a piece of black card stock cut to 4 1/4" x 5 1/2" and then added that to a side folding white A2 sized card base.  To finish my card I added some black enamel dots in small and medium and then used my Silver Moondust Nuvo Crystal Drops on the tail lights and a coating of Grey Mist Translucent Nuvo Jewel Drops over the back window. I set it all aside to dry for 24 hours and that finished off this card.  See you all soon! Thanks for stopping by.


Off to Party -Old Design (10003-Z)
Off to Party

Friday, June 8, 2018

SumMore Fun Challenge #30 - Land of the Free


Hello everyone,
Our new challenge #30 is up and we want you to join us!  This mood board is amazing and perfect for masculine cards.  I used the mood board and the colors and came up with this design. So let's check it out:

I started with a white A2 card base and then layered some blue card stock that was cut to 4 1/4" x 5 1/2" on top.  I then cut out a piece of Kraft card stock to 4" x 5 1/4" and placed fun foam on the back, then layered it onto the blue card stock with a slight angle.  I then pulled out an old Webster Dictionary I use just for crafty projects and using the page with "Country" on it, I tore the page gently to give it a worn edge and then took the Eagle stamp from the Raisin Boat Strokes of Pride (10212-Z) stamp set and using some Hot Fudge Ink I stamped the Eagle on the top left side of the page, I then treated the page with my anti-static powder tool and stamped the star from the same set on the bottom right corner going off the edge with Versamark Ink then heat set with Simon Says Stamp Embossing Powder in Steel Navy.  I ripped a page out of the dictionary with more open space and stamped the large sentiment in Versamark Ink and again used the Steel Navy embossing powder, then ripped the edges around the sentiment and used some vellum adhesive on the back.  I then took some gold embroidery thread and wrapped it around my fingers into a nest and laid that behind the sentiment for some added interest.   Thanks for stopping by, see you all soon and please go over to the mood board and link your project up.
Challenge #30


Strokes of Pride (10212-Z)

Saturday, June 2, 2018

Introducing Our Wild One


Hello everyone,
It is my day to take over the blog and I am so excited to share this adorable baby card with you.  I started with a 4 1/4" x 5 1/2" card base using some cute striped pattern paper, I then cut down a piece of blue card stock to 4" x 5 1/4" and popped it up with some fun foam.  I layered some burlap ribbon, striped card stock and my "Introducing our...." sentiment stamped onto Kraft card stock onto the blue paper.  I then cut a circle out of Kraft card stock and then a smaller circle out of white and placed fun foam between the layers to give it some added dimension.  I then cut out a cute little onesie in blue ombre colored card stock and then stamped the adorable lion from the "Onesie, Twosie (10038-Z)" Raisin Boat stamp set onto some white card stock. I colored him in with my Tombow markers and then fussy cut him and laid him onto the onesie.  I added some glitter to the mane and some black glaze to the eyes. I stamped the "Wild One" sentiment onto another piece of Kraft card stock and then made a little banner with some blue paper and striped paper and put that behind the focal point.  To finish it off I added a few confetti sequins in blue in different sizes and my card is complete.

Our current challenge is still up, I have attached the link below for you to join us and the stamps I have used are listed below.  Thank you all, see you soon!

Challenge #29
Onesie, Twosie (10038-Z)

*And don't forget if you use code HEATHER10 you can save 10% off your order

Saturday, May 19, 2018

Welcome Baby


Hello everyone,
Today is my day to take over the blog at SumMore Fun (Victorine Originals) and I also have baby on the brain as my husband and I are going to be grandparents! So I pulled out this adorable set from Raisin Boat Stamps, "Onesie, Twosie" (10038) and got to work.


I started with an A2 card base in the color Lettuce going for a gender neutral card and with a pencil I lightly drew a grid towards the top of the card. I then took the adorable and wonky picture frame stamp from the set and stamped it in black ink four times, rotating the stamp a quarter turn each time.  I then used the puppy, stick horse, ducky and lion and stamped them each into their own frame.  At the bottom of the card I stamped the "Welcome Baby" from a stamp set in my stash in black ink towards the bottom right portion of the card base.  I liked the look I got from doing just this, but for this card I lightly colored in each image using colored pencils and added some glitter to the top with my Nuvo Clear Glitter Pen.  I colored each of the frames in a light grey with the pencils as well. I think this card would make great baby shower invites or be good at a gender reveal or even as a baby shower gift card, and it would be so easy and quick to mass produce.  Another added bonus is it is a one layer card, so postage costs if mailing would be reasonable.
I hope you have enjoyed my card today, hope you have a great day and please join in on our current challenge, I will link below to the mood board below.
See you all soon!
Challenge 28 Mood Board


Onesie, Twosie (10038-Z)

Friday, May 11, 2018

Red, White & Blue Farm House


Hello everyone,
The mood board for the SumMore Fun Challenge #28 is up and it is a good one!  Here is my take on it.


I started with a piece of Kraft card stock cut to 4 1/4" x 11" and then  scored at 5 1/2" for a top fold A2 card.  I then cut down a piece of decorative card stock to 4" x 5 1/4" and added some decorative Kraft colored ribbon from my stash which I glued to the front and taped down on the back side.  I then added fun foam to the back, cutting a channel so the ribbon did not leave a bump on the front of the card.  I then added the panel to the card base and set it aside while I worked on the rest of the card.
I then took a piece of white card stock and stamped the Farm House image (1959-G) from Victorine Originals in Chocolate Brown Ink and colored the image in with my Prismacolor Pencils and then fussy cut the image out. I popped the image up with some foam tape and added it to the front of the card on the bottom, right.  I then used the sentiment "Thinking of You" from the "Oops A Daisy" (10236-Z) Raisin Boat set in the same Chocolate Brown Ink on a piece of Kraft card stock.  I cut it down and added a diagonal cut at the front for some added interest and then popped it up with some more foam tape and added it to the card front.

To finish it all off I added a few sequins and some super tiny stars over the "i's" in the sentiment and then using Nuvo Glow Drops in Banana Split I colored in the windows on the Farm House.
Thanks for stopping by!

Challenge #28 Mood Board


We would love for you to play along so I have included the Mood Board and the link to the challenge below.  Also, if you use the code HEATHER10 at the shop you can get 10% off your purchase and the stamp sets I used in my card are shown below.
I look forward to seeing you all again soon!

Farm House (1959-G)Oops a Daisy (10236-Z)

Saturday, May 5, 2018

Cat Card


Hello everyone,
It is my day to take over the blog at SumMore Fun (Victorine Originals) and I wanted a card that could be put into my stash and pulled out for different occasions.  I believe this card would be good as a "thinking of you," "just a note," pet sympathy or even a birthday card, and it came together quickly and easily.
I started with a piece of tan card stock cut to 4" x 5 1/4" and treated it with my anti-static bag, then I stamped the cat in black versafine ink and heat embossed with Nuvo Glitter Embossing powder in Glitter Noir, I then stamped the little paw print three times in black versafine ink and heat set with my heat tool.  After I finished the panel I cut a piece of black card stock to 4 1/4" x 5 1/2"  and glued that to a top fold A2 sized white card base.  I then attached the cat panel to the card and that finished it off.  I can then either add a sentiment to the front or inside at a later time when I need a quick card.
Thanks for joining me today, see you soon!

Products Used:
Cat's Paw (74302-A)

Cat Stamp